User Guide - Adobe PRemiere Workflow
How to integrate Color.io with Adobe Premiere
Color.io is a AI driven color grading and film emulation engine that offers the ability to generate color managed 3D LUTs (Look Up Tables). LUTs are used to transfer color grades between Color.io and third party applications like Adobe Premiere Pro for professional video and film workflows.
Basic Setup in Premiere
The 3D LUTs generated by Color.io will just work in Adobe Premiere Pro as is, however to retain the highest color fidelity throughout your color grading pipeline, a basic set up of Premiere Pro is recommended.
1. Enable Display Color Management
Open the preferences window, go to the "General" tab and check "Enable Display Color Management":
Preferences → General → Enable Display Color Management
If this option is greyed out, go to File -› Project Settings -› General and set the Renderer to Mercury Playback Engine GPU Acceleration under Video Rendering and Playback.
2. Setup RAW Video Files
RAW video should be debayered into the camera's native log format because that gives you the most dynamic range and the widest gamut to color grade in. Adobe Premiere defaults to camera-native log for most RAW video formats. If you're not seeing a flat LOG image by default, go into Effect Controls of your source file, scroll to the bottom to Output Transform Settings and set both Color Space and Gamma Curve to your camera's native log format.


Developing looks in Color.io
Copy frames from Premiere to Color.io
In Premiere, click the camera icon to export the current frame. You can then drag and drop or copy and paste this frame into Color.io for look development.
To speed up the frame exchange process even more you can use a free extension. These extensions for Premiere allow you to copy frames directly to the clipboard. Currently there are two excellent free extensions available to download:
https://app.pluginplay.app/tool/copy-pasta
https://knightsoftheeditingtable.com/arrow
Use PNG as a format whether you are copying frames with an extension or exporting frames with Premiere's native tools. This will avoid potential color difference issues due to device profile embedding in JPEGs.
Set up Color.io for your footage
With your frames imported into Color.io, first select your Input Color Space. This should match the LOG encoding of your footage. You will immediately see that contrast and saturation will be normalized when you set the correct input color space.
Next, set your output color space to match your working space in Adobe Premiere. By default Adobe Premiere works in Rec709 so that is what you should select.
Color.io comes with a few different Rec709 flavors: Rec709 (plain), Arri Rec709 or Kodak 2383 Rec709. There is no one correct version of Rec709 - select whichever one you like best or go with the default Rec709 when in doubt. You can always change this later.
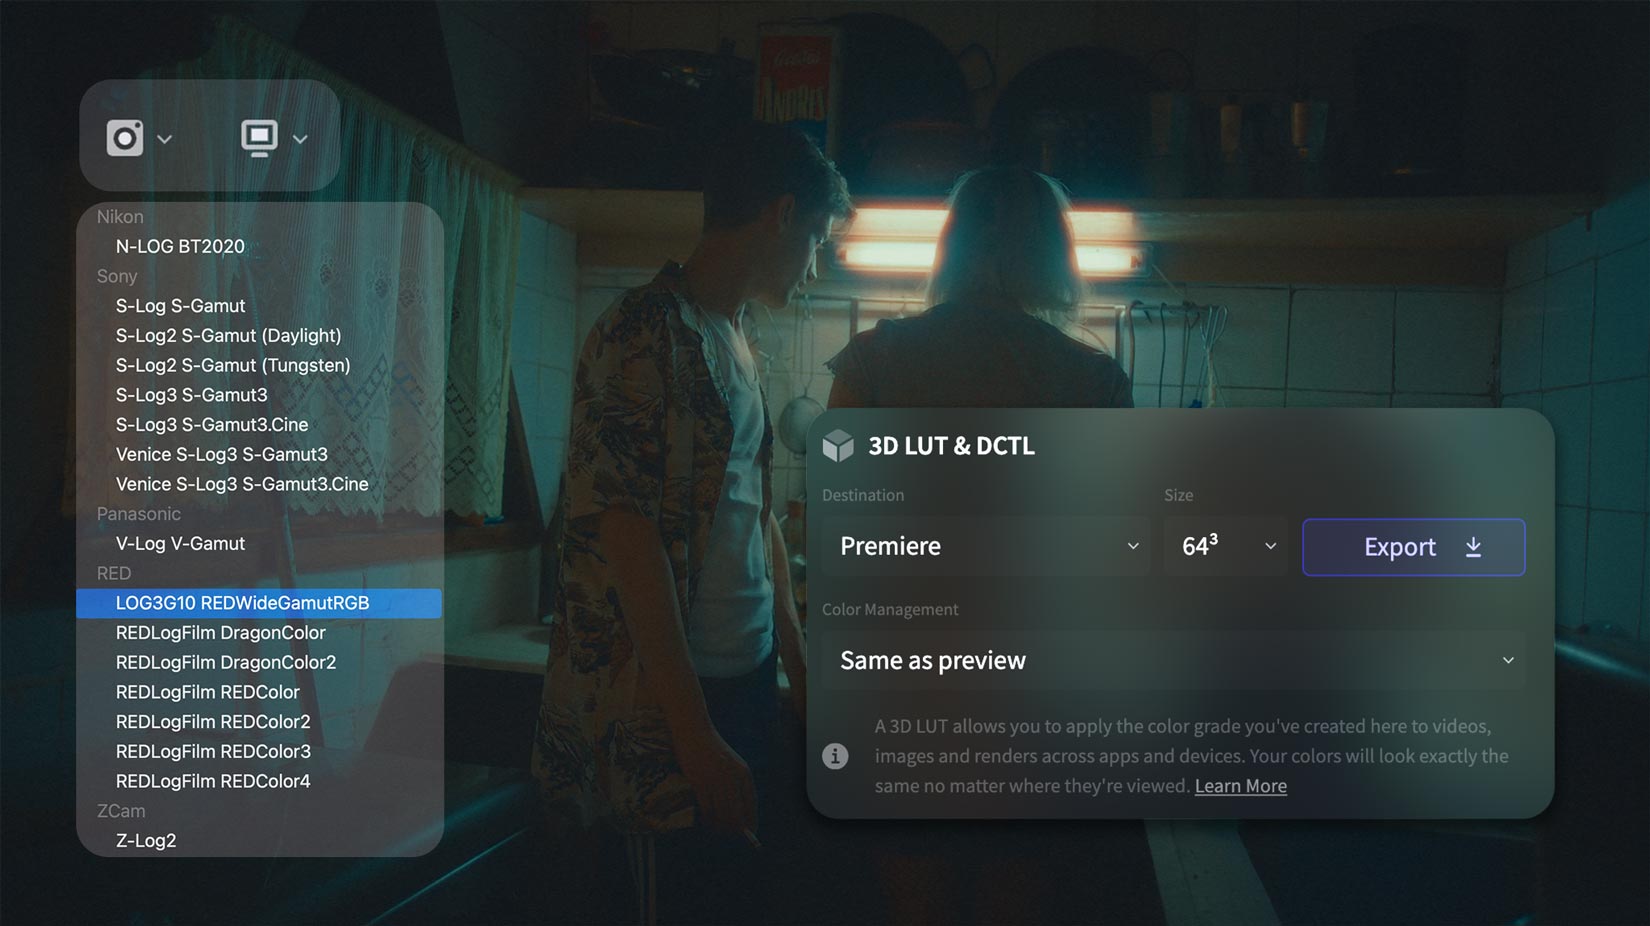
Export a LUT from Color.io into Adobe Premiere
Once you're happy with the look you created in Color.io, simply go to Export and select "Premiere" from the drop down under 3D LUT Destination and click Export. You can leave everything else as is. This will download a LUT file to your device that you can drop into Premiere next. You can learn more about LUTs and how to export them in the user guide.
Note: 3D LUTs can only encode color information so grain, halation and other effects are not transferrable via 3D LUTs.
How to add LUTs to the Lumetri Panel in Premiere Pro
To easily access 3D LUTs in Premiere Pro's Lumetri color panel, follow these steps for your operating system. Premiere Pro scans these folders when it starts. If you add LUTs while Premiere Pro is open, restart the app to load them. LUTs in the Creative folder will be in the Creative drop-down, and those in the Technical folder in the Input LUT drop-down.
MacOS
- Create these folders on your hard drive, if they aren't present:
/Library/Application Support/Adobe/Common/LUTs/Creative
/Library/Application Support/Adobe/Common/LUTs/Technical - Copy your exported LUTs from Color.io into these folders. Use the Technical folder for technical LUTs like color space conversions, and the Creative folder for creative LUTs like film emulations etc.
Windows
- Create these folders on your hard drive, if they aren't present:
C:\Program Files\Adobe\Common\LUTs\Creative
C:\Program Files\Adobe\Common\LUTs\Technical - Copy your exported LUTs from Color.io into these folders. Use the Technical folder for technical LUTs like color space conversions, and the Creative folder for creative LUTs like film emulations etc.
With Color.io you can edit images and build 3D LUTs with a powerful online raw developer and analog film look designer for photographers and filmmakers. Craft stunning film color in record time that works for any camera, in any software and on any device, directly in your browser.